Webmail settings
Password reset
In order to use the digital services at the UDE, it is still absolutely necessary to renew the password („password reset“) of the personal university ID or the function IDs used.
You can reset your passwords at the e-Points.
Settings in Webmail
You can choose between different settings in the Roundcube Webmail Interface:
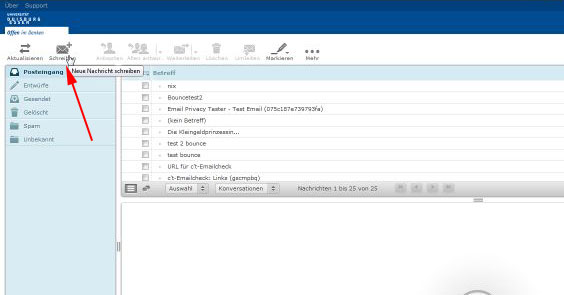
- Compose a new message
- Create a new folder
- Create an Address Book
- Add your own Address Book or List of Recipients
- Create your own signature
- Multiple identities – different signatures
- Set up a redirection
- Set up a vacation message
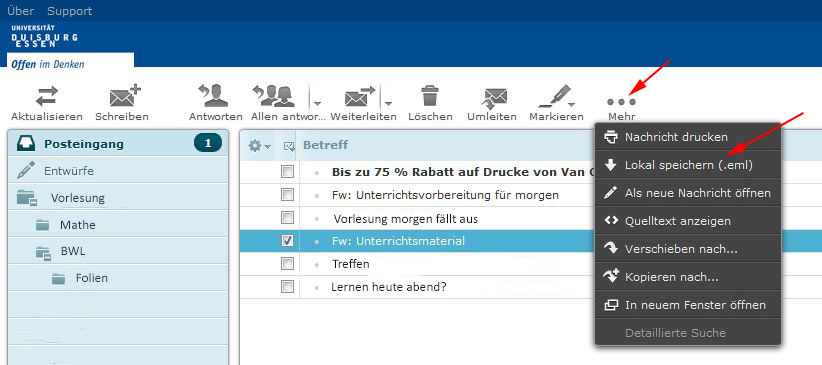
- Save e-mails locally
- Set up a spam filter
- Hightlight messages
- Sort messages
These settings are implemented via a graphic user interface by Sieve.
Create a new folder
Your e-mails are saved in folders. By default you have the folders “Inbox”, “Sent”, “Drafts” and “Deleted Items”.
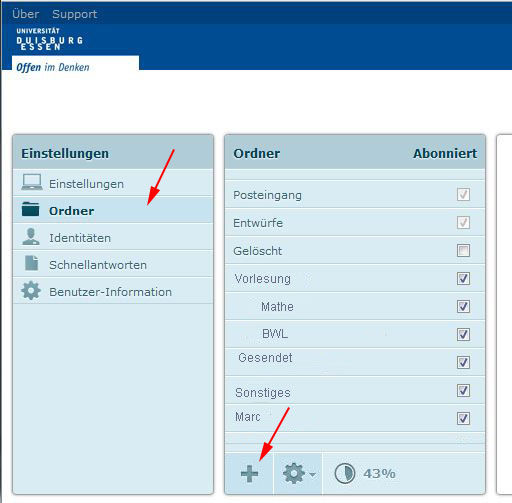
You can create new folders and move your e-mails into them. To create a new folder, press “Settings” in the upper right corner and then choose “Folders”. Now click the +-button at the bottom.
Enter a name for the new folder and then press “Save”.
Create an Address Book
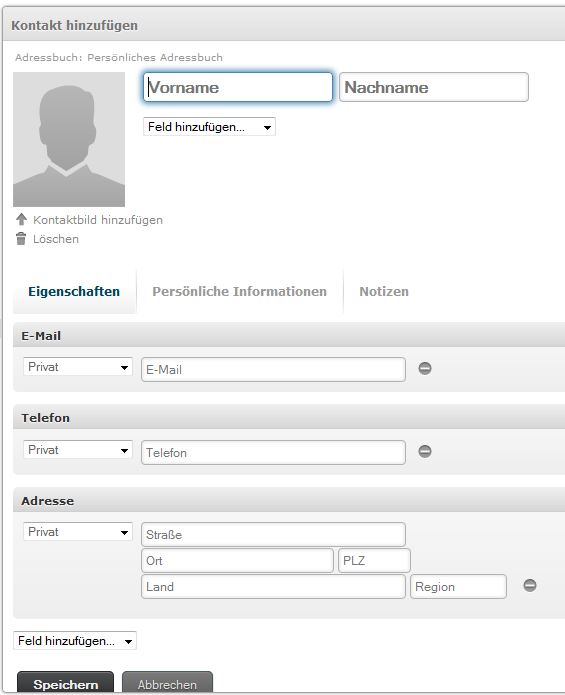
In the segment “Address Book” you can organize your contacts. To add a new contact, go to the upper right segment “Address Book”.
Now click the +-button in the second column and enter the information you want to put in your address book in their respective fields.
To confirm press “Save”.
Add your own Address Book or List of Recipients
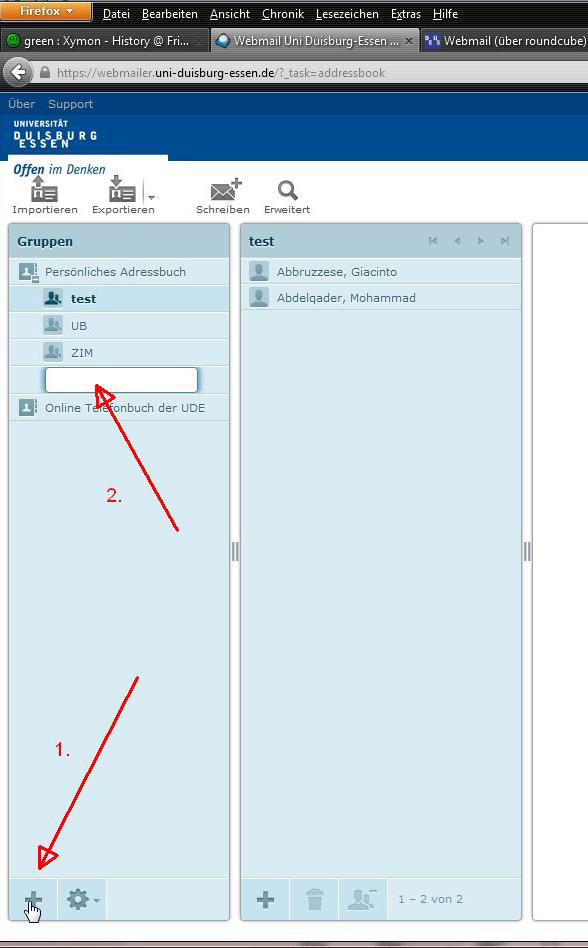
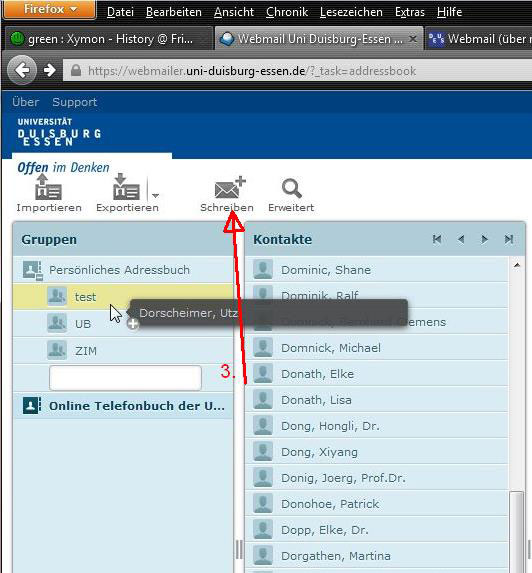
It is possible to create multiple custom Address Books. Please click on “Address Book” and then on the +-symbol in the lower left corner (1.) Now choose a name for your custom address book (2.)
You can import/export addresses from other Addres Books per drag & drop.
You can compose messages to all contacts in your address book. For this you need to first click on an address book of your choice and then on “Compose” (3.) Now all entries in your address book will be listed in the messages recipient field.
Multiple identities – different signatures
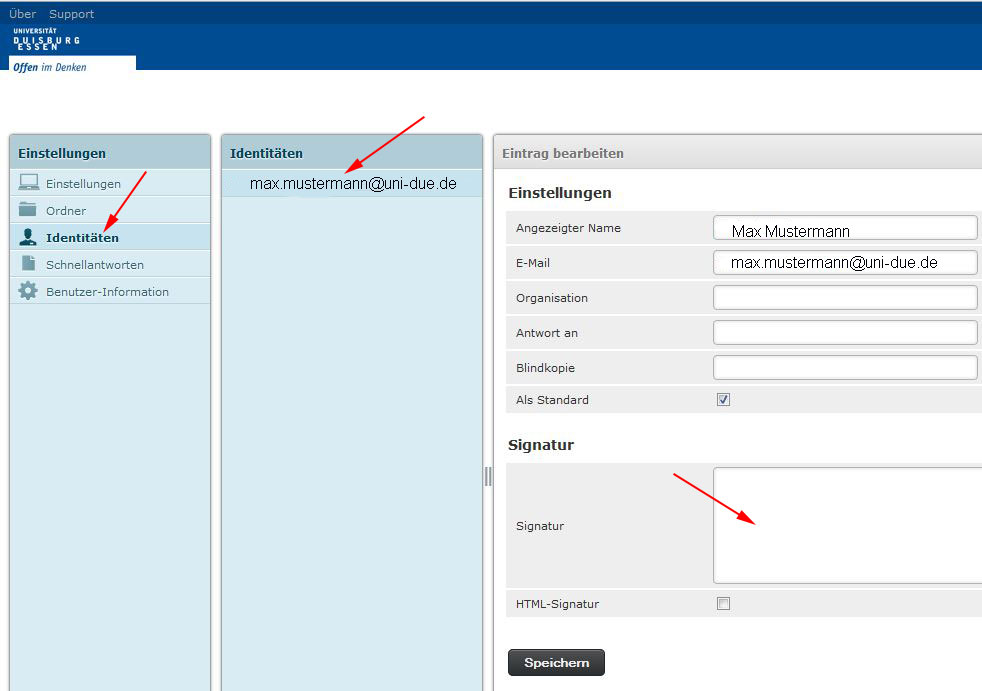
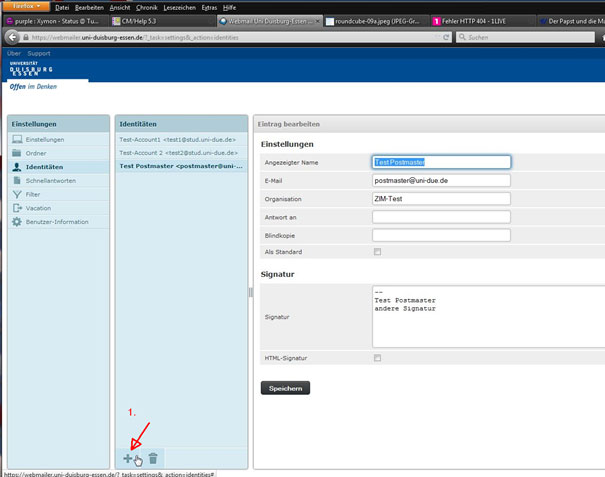
To use different signatures in Roundcube, you are required to create an identity for each signature. For this, go to the identity menu and press the +-symbol (1.) and then edit the identity entry.
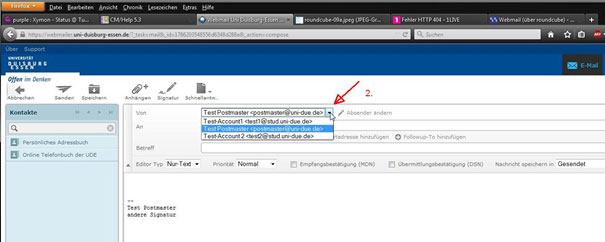
Save the newly created identity. Now whenever you compose a new message, you can choose your identity via a drop down menu. (2.)
Set up a redirection
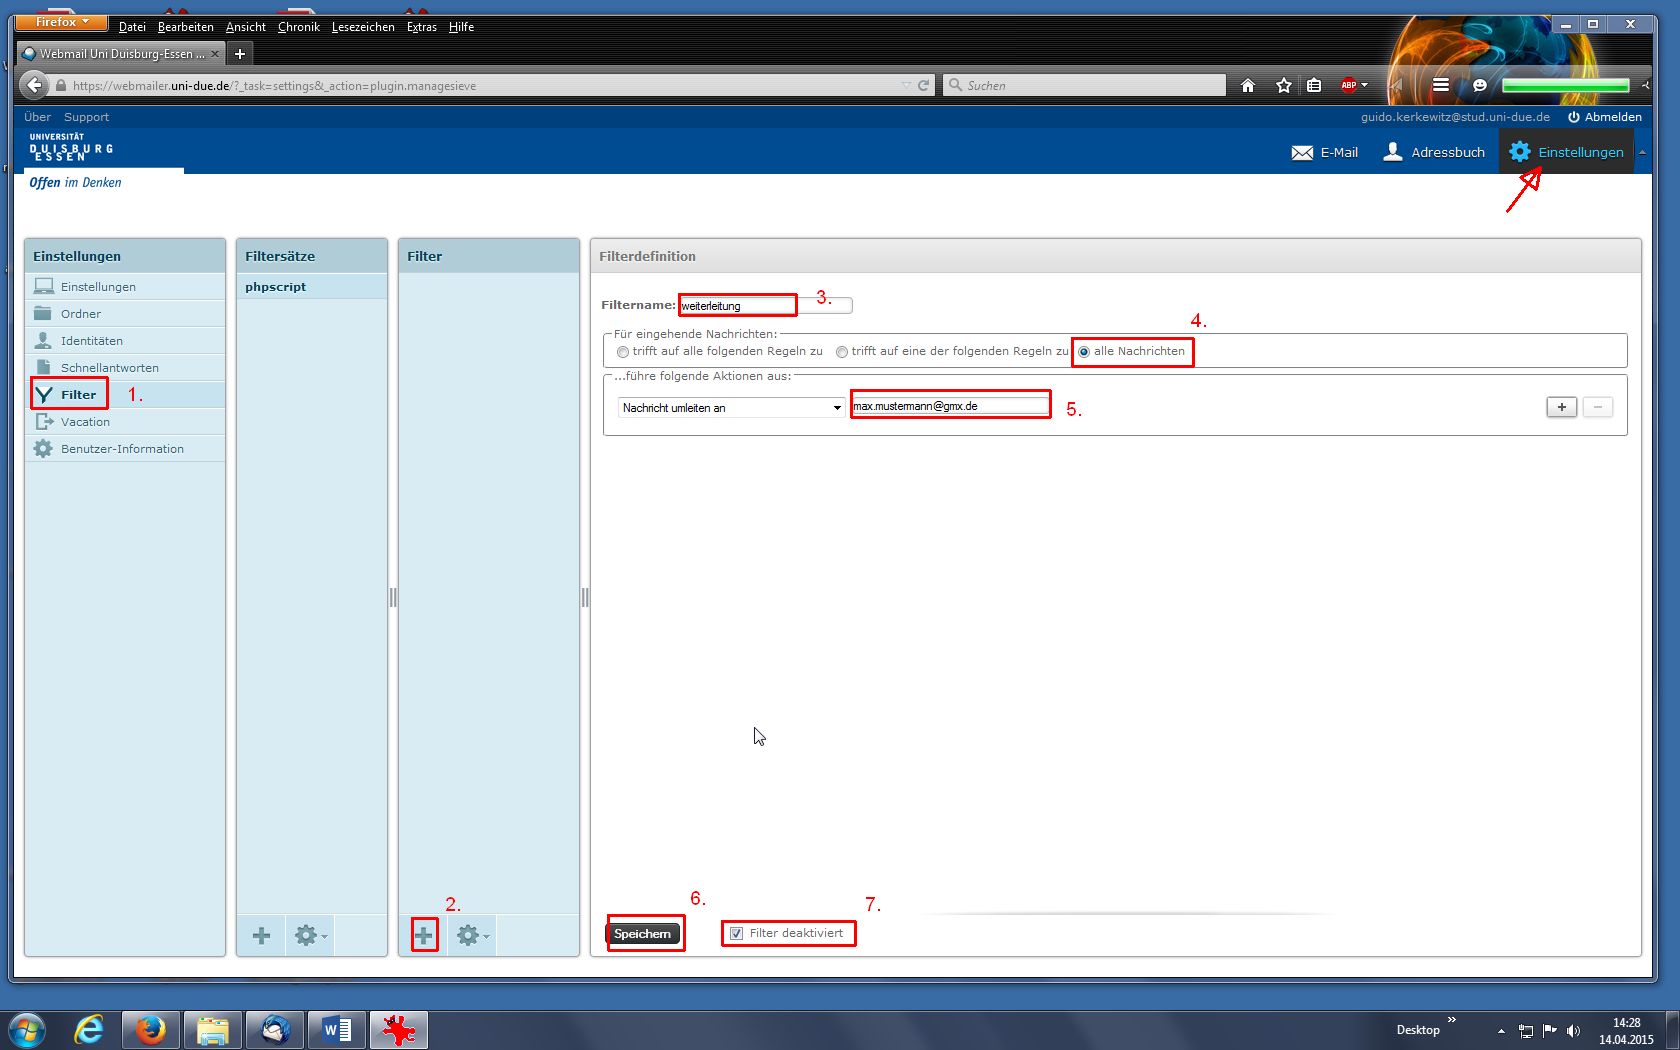
After logging in click on “Settings” in the upper right corner.
Then choose “Filter” in the menu on the left (1.) and then press the +-symbol to add a filter rule (2.)
Now enter the name of your filter (3.) (e.g.: Redirection)
Choose on which messages the rule shall apply. (e.g.: all messages) (4.)
- You can redirect the messages without keeping a local copy:
Choose the rule “Redirect message to” and enter the e-mail address, your incoming messages shall be redirected to.(5) - Or you can redirect the messages and keep a local copy:
(Advantage: When the external account cannot be reached, all mails are still saved on the university account. Please remember to clean up your mailbox from time to time so that you do not exceed the mailbox quota.)
To confirm your settings click “Save” (6.)
Note:
Before saving, check, if your filter is activated. (7.)
Create a vacation message
If you want to create a vacation message for your e-mail address, this is how you do it:
In the upper right corner click on “Settings” and in the menu on the left choose “Vacation”. You can activate the message with the “On/Off-button”.
To confirm the filter rules click “Save”
Note:
Please note that filters are not time bound. They are active until they either get deactivated or deleted.
Set up a spam filter
Via the filter options all users whose mailbox is on the mailbox servers can set up a filter for the server controlled treatment of conspicuous e-mails.
To handle conspicuous e-mails you need to create two filter rules (one for 10 star mails: very likely to be spam, and one for 5 star mails: likely to be spam).
To do this, follow these steps:
Set up a rule for 10 star mails (very likely to be spam):
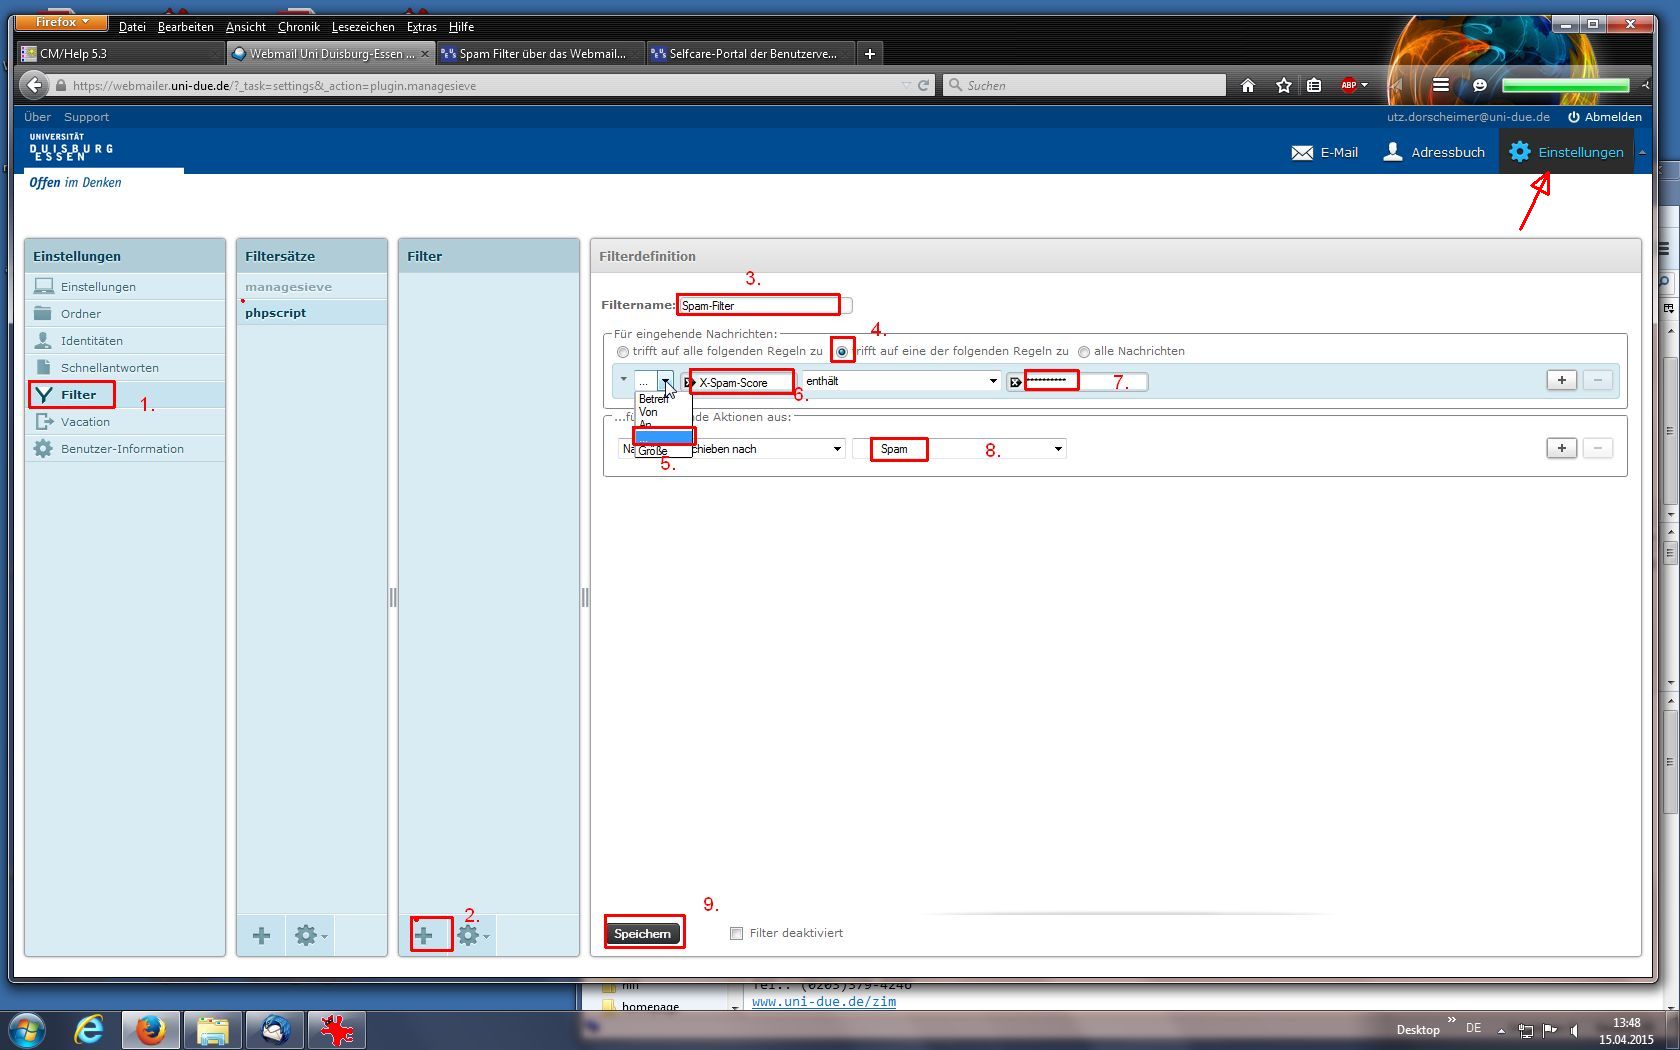
Log into the webmail interface of UDE and click on “Settings” in the upper right corner.
To create the filter, click on “Filters” in the left hand menu. (1.)
Add a new filter by clicking on the +-symbol (2.) and enter a name for the filter (e.g. spam filter). (3.)
Activate the middle option “matching any of the following rules” (4.)
For the menu on the left choose “…” (5.) and enter “X-Spam-Score” (6.)
In the textbox on the right enter ten stars (without spaces): “**********” (7.)
Below, for the folder your spam shall be moved to (Move messages), choose “Spam” (8.) and save the filter rule (9.)
Set up a rule for 5 star mails (likely to be spam)
To create another filter rule, again click on “Add new rule”. Then follow the same steps as in the previous filter rule, but instead of 10 stars you only enter 5.
Under “Actions” activate the options “Move message to” and “a new folder with the name”. Name this folder “Unknown” (10.)
Highlight messages
You can highlight incoming messages in your mailbox depending on different criteria, for example to discover mails from certain senders or mailing lists quicker or to highlight mails from certain senders.
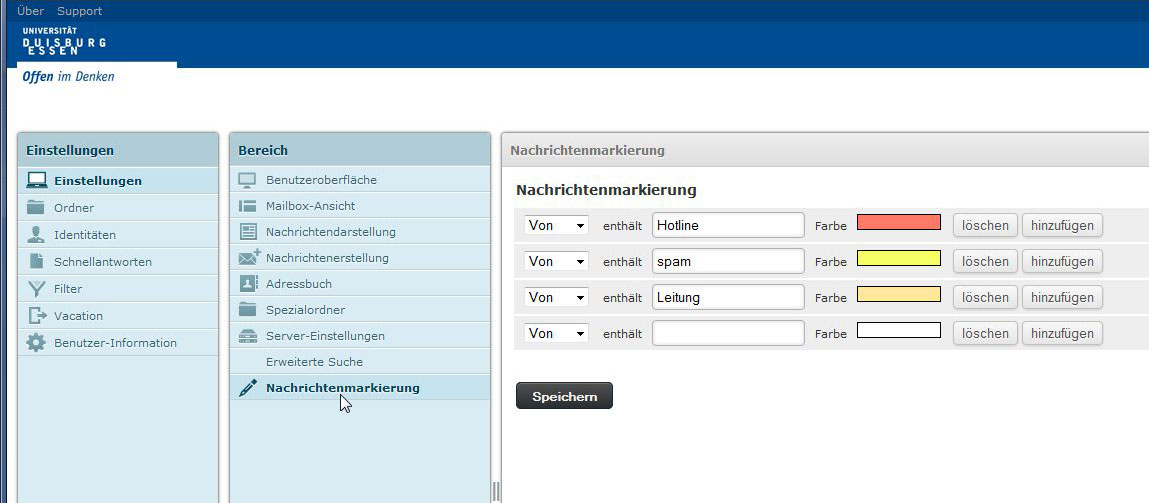
Under “Settings” -> “Message Highlights” you can change your settings. You can create different rules:
- Which mail-header should be considered for highlighting messages: Sender, Subject, Recipient, Copy-Recipient
- Text, the header has to contain, for example “Hotline”, “Spam”, “Administration” etc.
- Choose a color, that will be used as a background for this mail.
Sort messages
The Roundcube webmailer provides different options to set up your inbox-lists or to sort your messages.
To sort messages by date, all you need to do is click on “Date” above the messages.
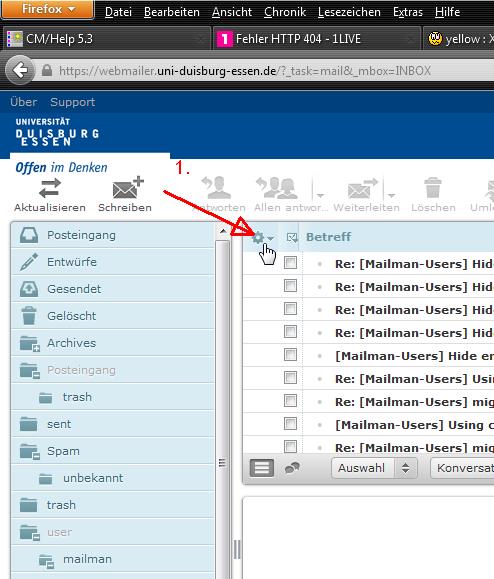
To permanently set up how to sort your inbox, click the “settings” symbol in the upper left corner of the subject line. (1.)
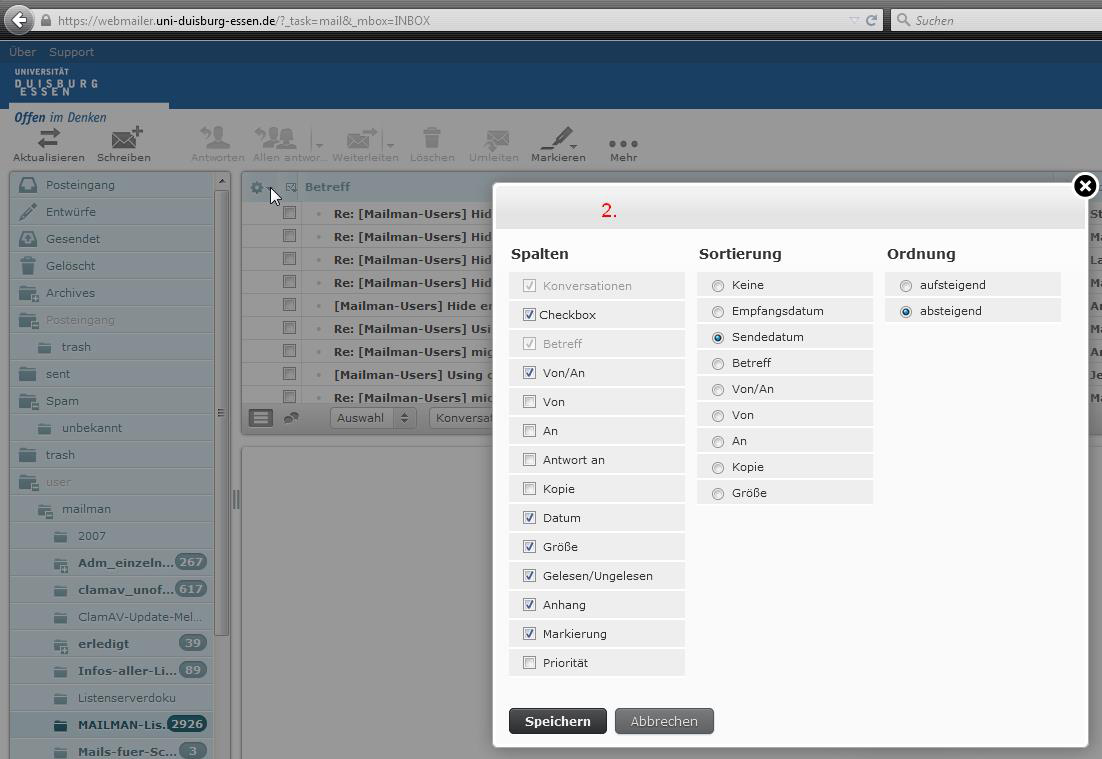
Choose your preferred option (2.) and save your settings.
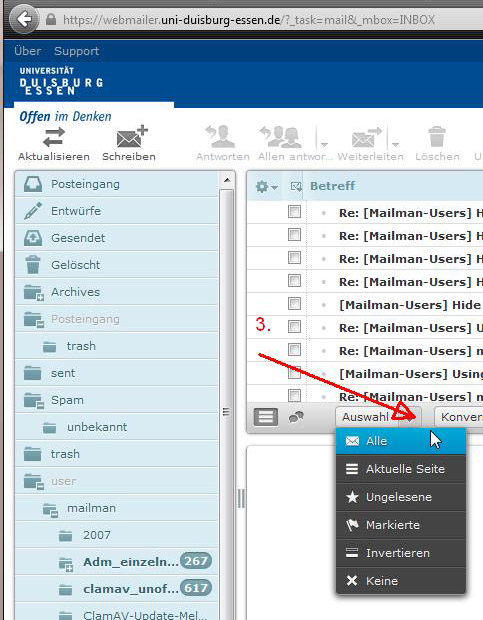
For example, to mark all messages click on “Select” (3.) and then “All”.
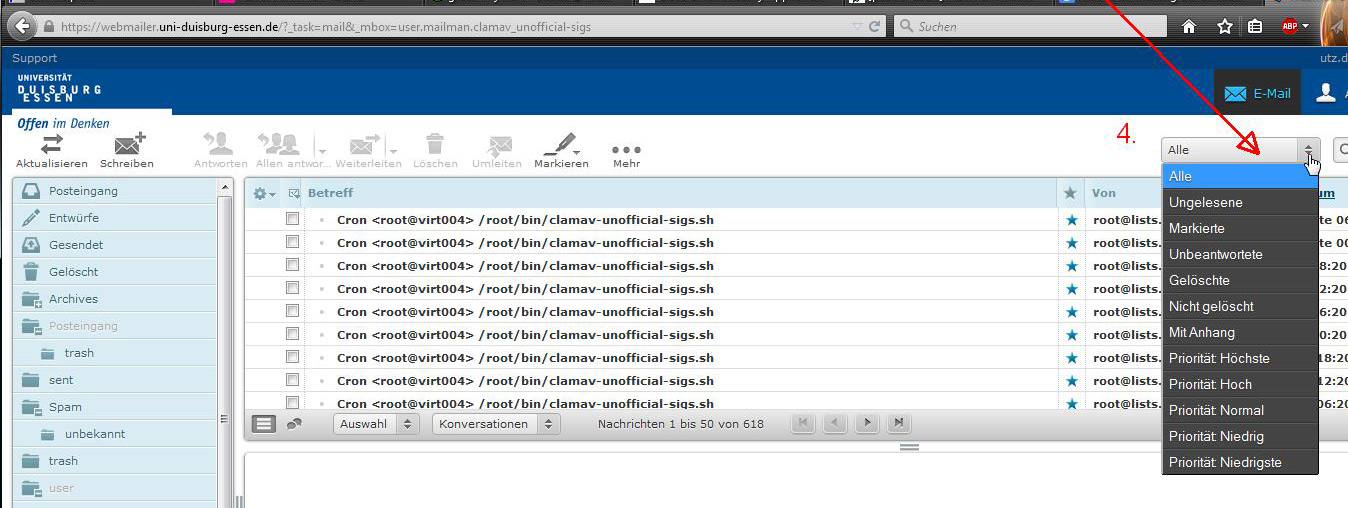
Another possible way is to for example only show “Unread” or “Unanswered” messages, for the duration of the current session. For this click on the option “All” (4.) and choose your preferred setting.


